My First Blog
第一篇博客,顺手记录 Hexo + Github 的博客搭建过程(师从Gemini)
环境准备
我是在 Windows 上搭建的博客,以下是需要准备的工具:
- GitHub账号 和 Git(执行
git --version检查是否安装成功) - Node.js 环境(执行
node -v检查是否安装成功) - Hexo CLI 工具(执行
npm install -g hexo-cli安装)
初始化博客文件夹
选择一个位置,执行以下命令创建一个新的 Hexo 博客文件夹。
1 | hexo init dzc-blog |
注意:hexo init 会创建一个目录,后续的内容都在这个目录下,这里我命名为 dzc-blog。
本地预览
在博客文件夹下(dzc-blog)执行以下命令,启动本地服务器,可以预览博客效果。
1 | hexo server #或 hexo s |

打开浏览器访问 http://localhost:4000 就可以看到博客的默认主题(Landscape)。
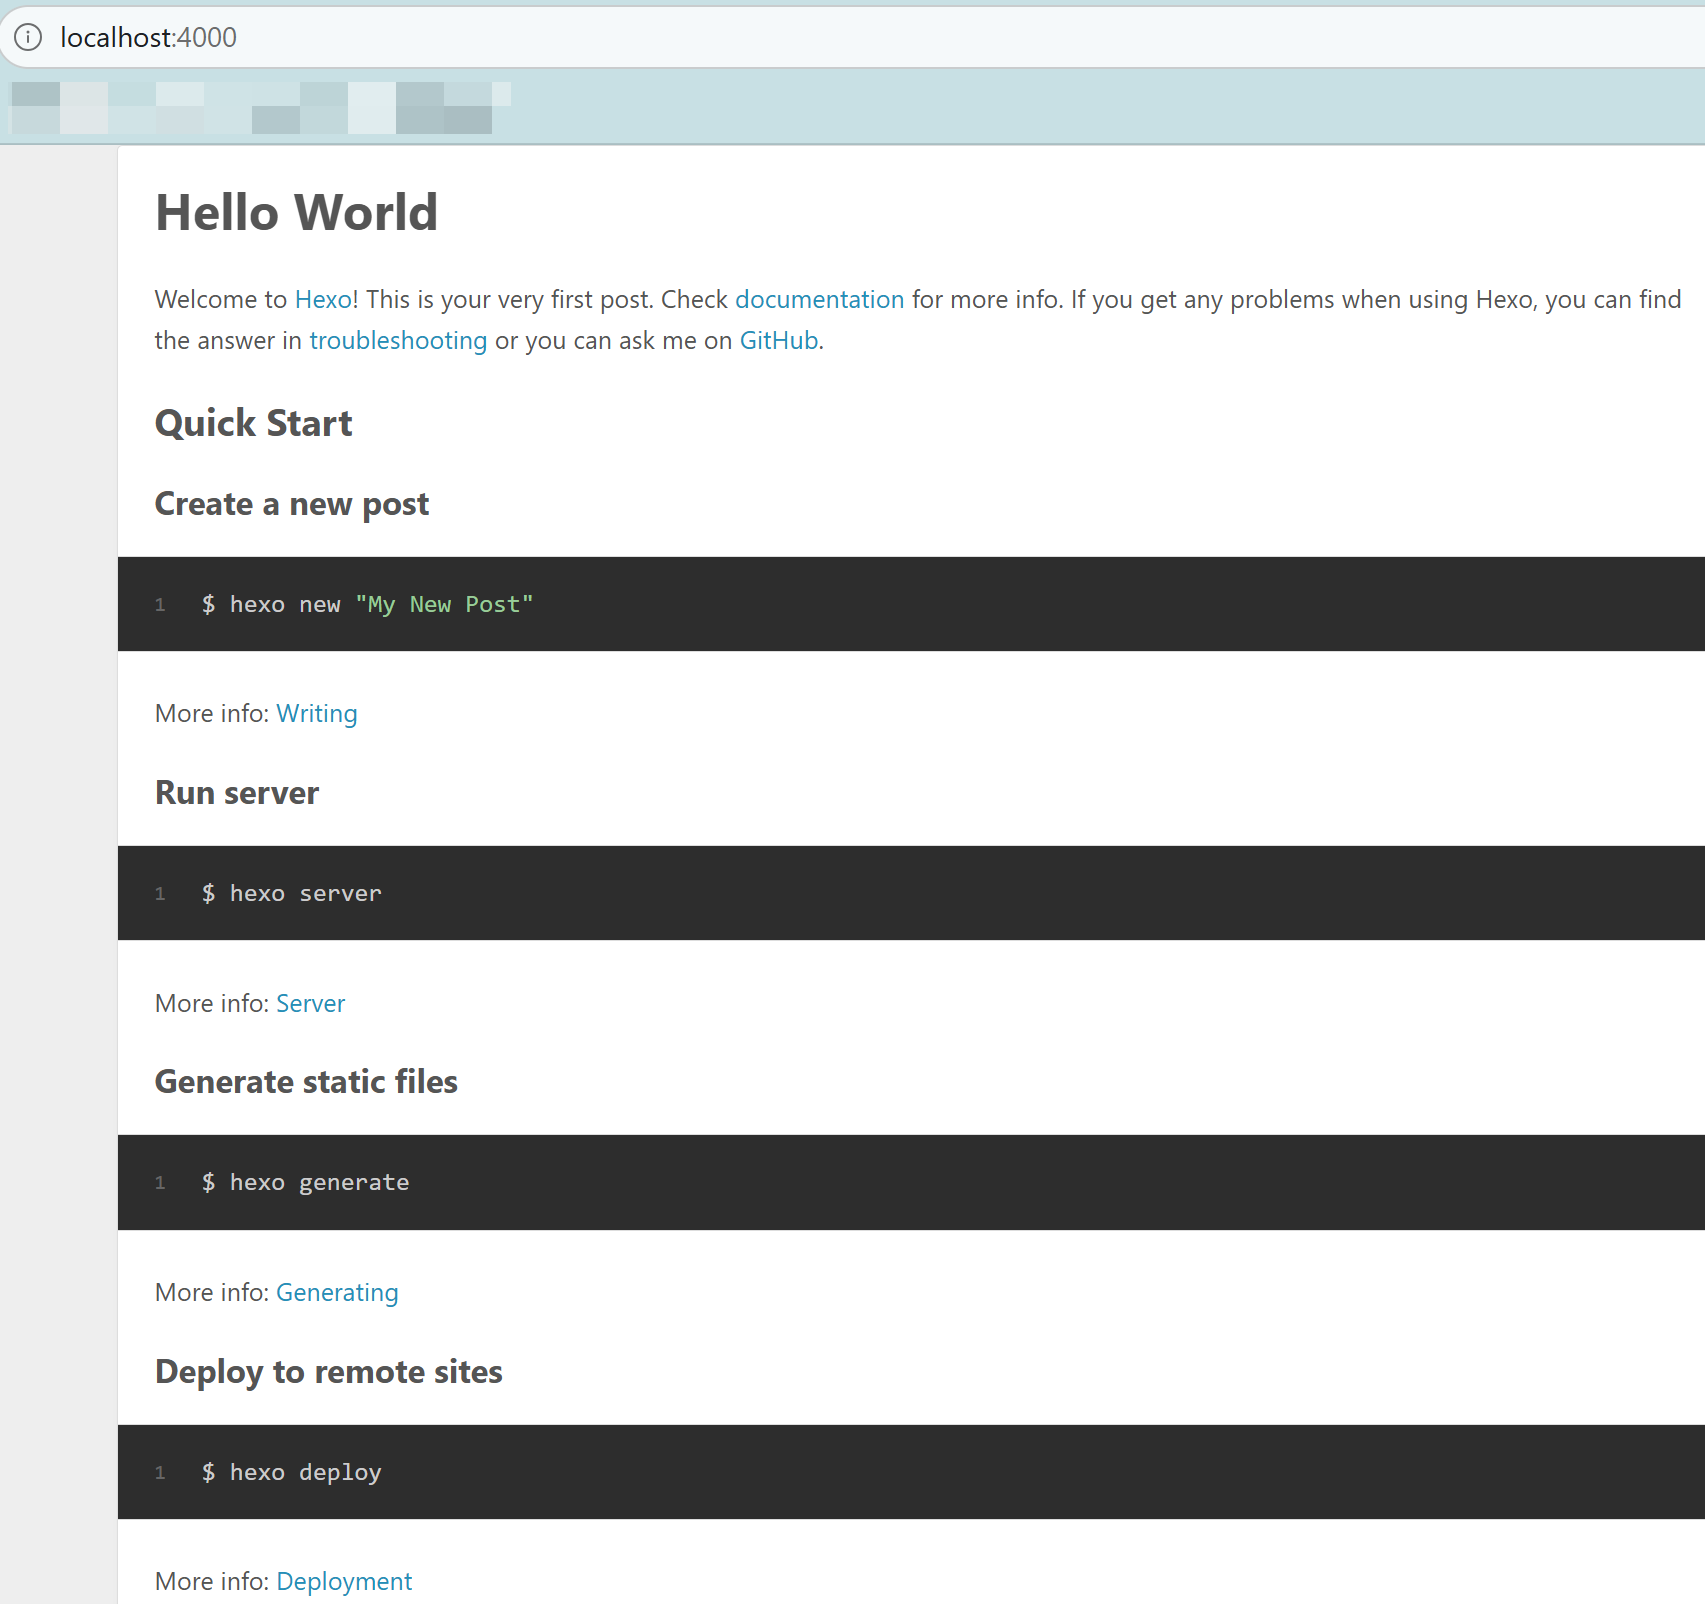
可以看到这里还给出了 Quick Start,正是以后发布博客会经常用到的。
部署 Github Pages
上一步中的博客只能在本地预览,接下来需要将博客部署到 GitHub 上,让全世界都能访问。
创建 GitHub 仓库
在 GitHub 上创建一个新仓库,名称必须是:github用户名.github.io(例如 dddddzc.github.io)。这个仓库将用来存放博客的静态文件,并通过 GitHub Pages 服务进行托管。
安装部署插件
执行以下命令安装 Hexo 的 Git 部署插件,这个插件会帮助我们将生成的静态文件推送到 GitHub 仓库。
1 | npm install hexo-deployer-git --save |
在配置完成后,以后使用 hexo deploy 命令就可以将博客部署到 GitHub 上了。
修改部署配置
打开博客文件夹中的 _config.yml 文件,找到 Deployment 部分,修改为以下内容(repo是我的实例,需自行替换):
1 | # Deployment |
博客撰写与发布
这是以后的常规流程,撰写博客 -> 生成静态文件 -> 部署到 GitHub。
撰写博客
在博客文件夹下执行以下命令创建一篇新的博客文章:
1 | hexo new "My First Blog" |
这会在 source/_posts 目录下创建一个新的 My-First-Blog.md 文件,用 typora/vscode 等编辑器打开即可编辑博客内容。
生成静态文件
编辑完成后,执行以下命令清理缓存并生成静态文件:
1 | hexo clean && hexo generate # 或 hexo g |
部署到 GitHub
生成完成后,执行以下命令将博客部署到 GitHub:
1 | hexo deploy #或 hexo d |
部署完成后,访问 https://dddddzc.github.io 就可以看到博客了。
以后的常规流程即:
- 首先 hexo new “xxx”
- 再编辑 xxx.md
- 最后 hexo clean && hexo g && hexo d
图床功能
目前写出来的博客不会显示图片(图裂),因为这些本地图片无法被访问到。需要将图片上传到图床(例如 GitHub 仓库/各类云存储)。
图床的本质是:将图片存放在一个公网可以访问的服务器上,只需要在博客里引用一个 URL 链接即可访问到。
这样做的好处是:博客加载更快、仓库体积更小、图片跨平台通用(发知乎、掘金也能直接复制粘贴)。
我使用 PicGo + GitHub 仓库的免费方案。
Github 图床创建
在 GitHub 上创建一个新的仓库,命名为 ImageBed(或者其他名字),这个仓库将用来存放博客的图片。
PicGo 配置
去 PicGo 官网 https://github.com/Molunerfinn/PicGo/releases ,选择合适的版本,例如我的 windows 选择 PicGo-2.5.3-x64.exe,
下载完成后,安装并打开。
进入设置界面,选择 GitHub 图床(也可以选择其他的):
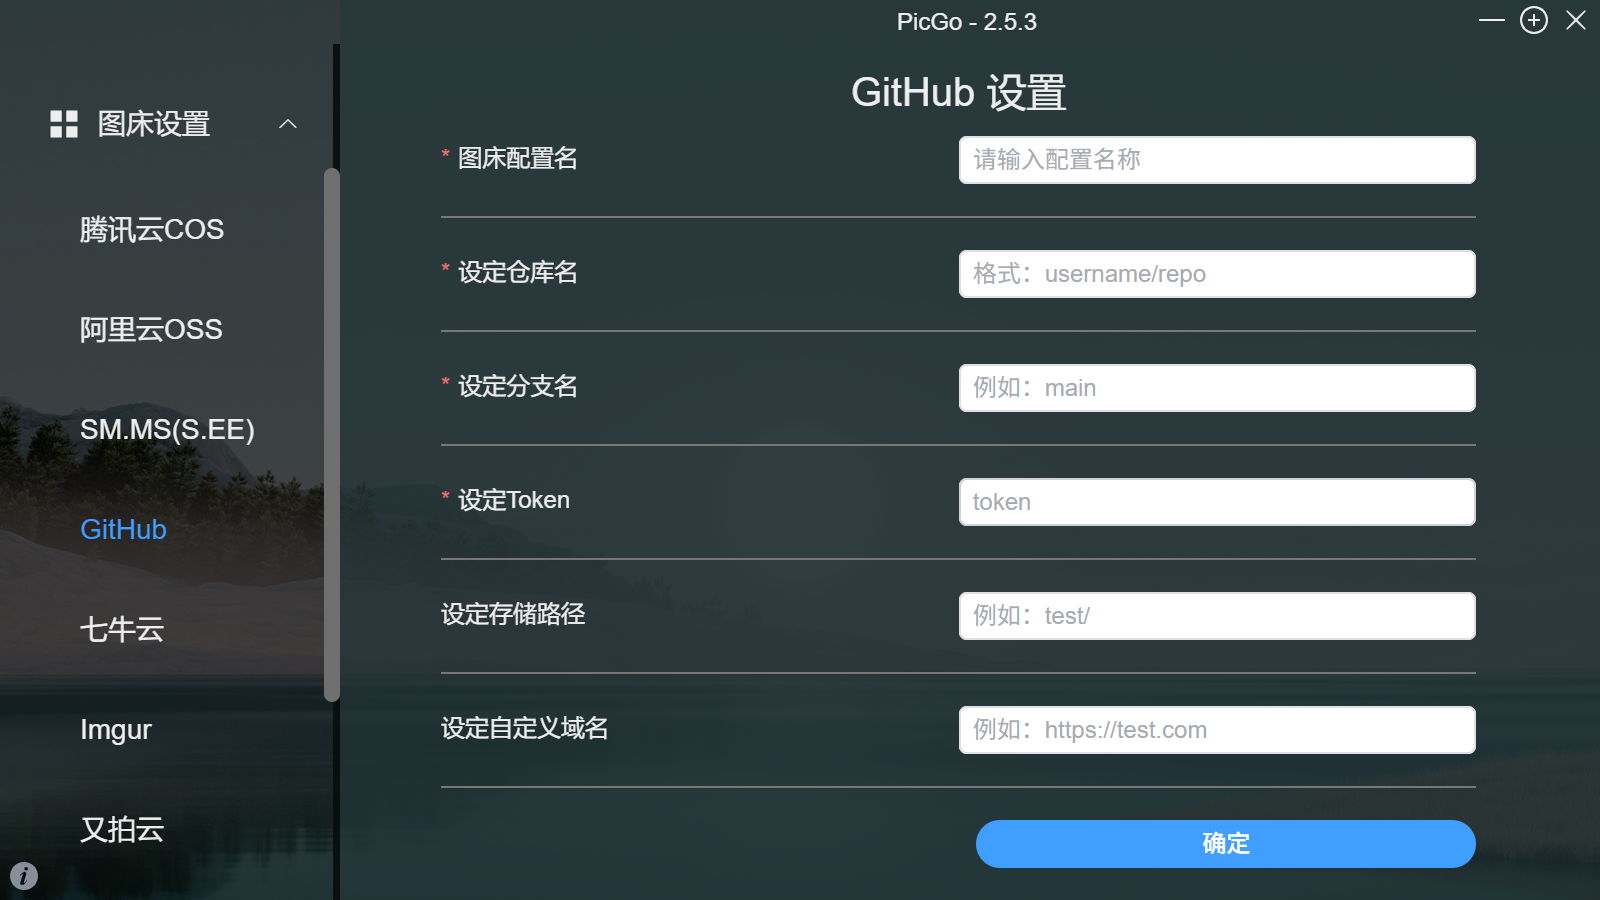
输入对应信息:
配置名:随便填,自定义。
仓库名:输入 你的用户名/图床仓库名(如 dddddzc/ImageBed)。
分支名:通常填 main。
Token:粘贴你的 Github Token。首次生成 Github Token 的步骤:点击头像 -> Settings -> Developer settings -> Personal access tokens -> Tokens (classic) -> Generate new token(勾选 repo 权限)。 注意:复制并保存好这个 Token,它只会出现一次。
存储路径:可以填 img/(这样图片会自动存入 img 文件夹)。
自定义域名:建议填 https://raw.githubusercontent.com/你的用户名/图床仓库名/main 。
PicGo 使用
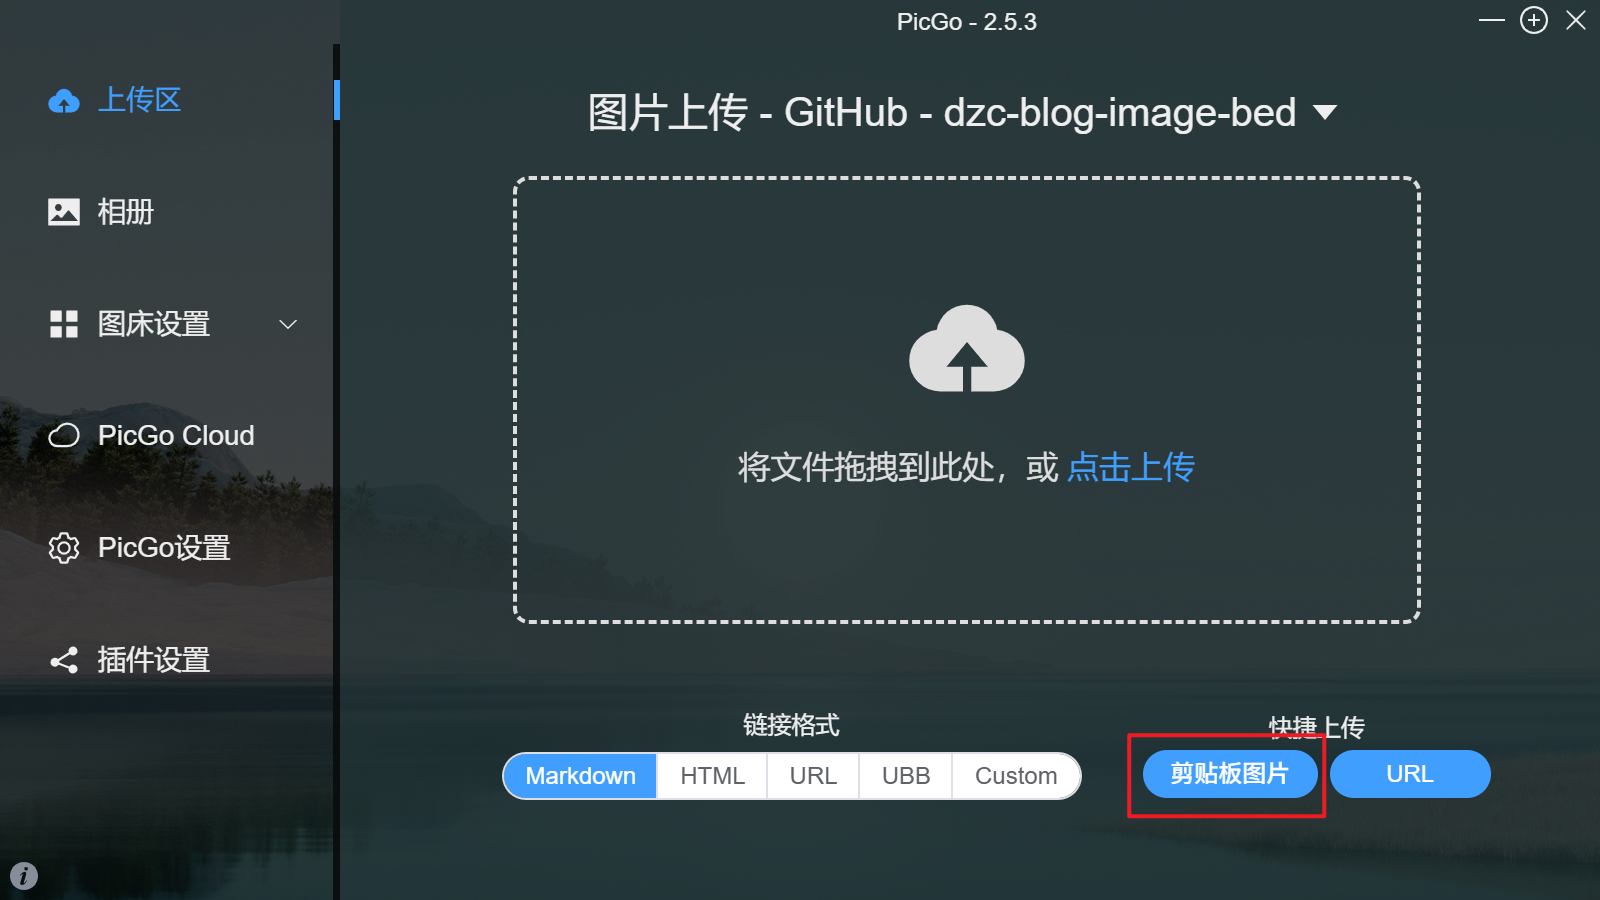
上传:你可以直接把图片拖进 PicGo,或者上传剪贴板里的截图(我喜欢这种方式)。
获取链接:PicGo 会自动将生成的图片对应 URL 链接复制到你的剪贴板。
粘贴:直接在你的 .md 文章里 Ctrl+V。
这样博客里的图片就可以正常显示了。
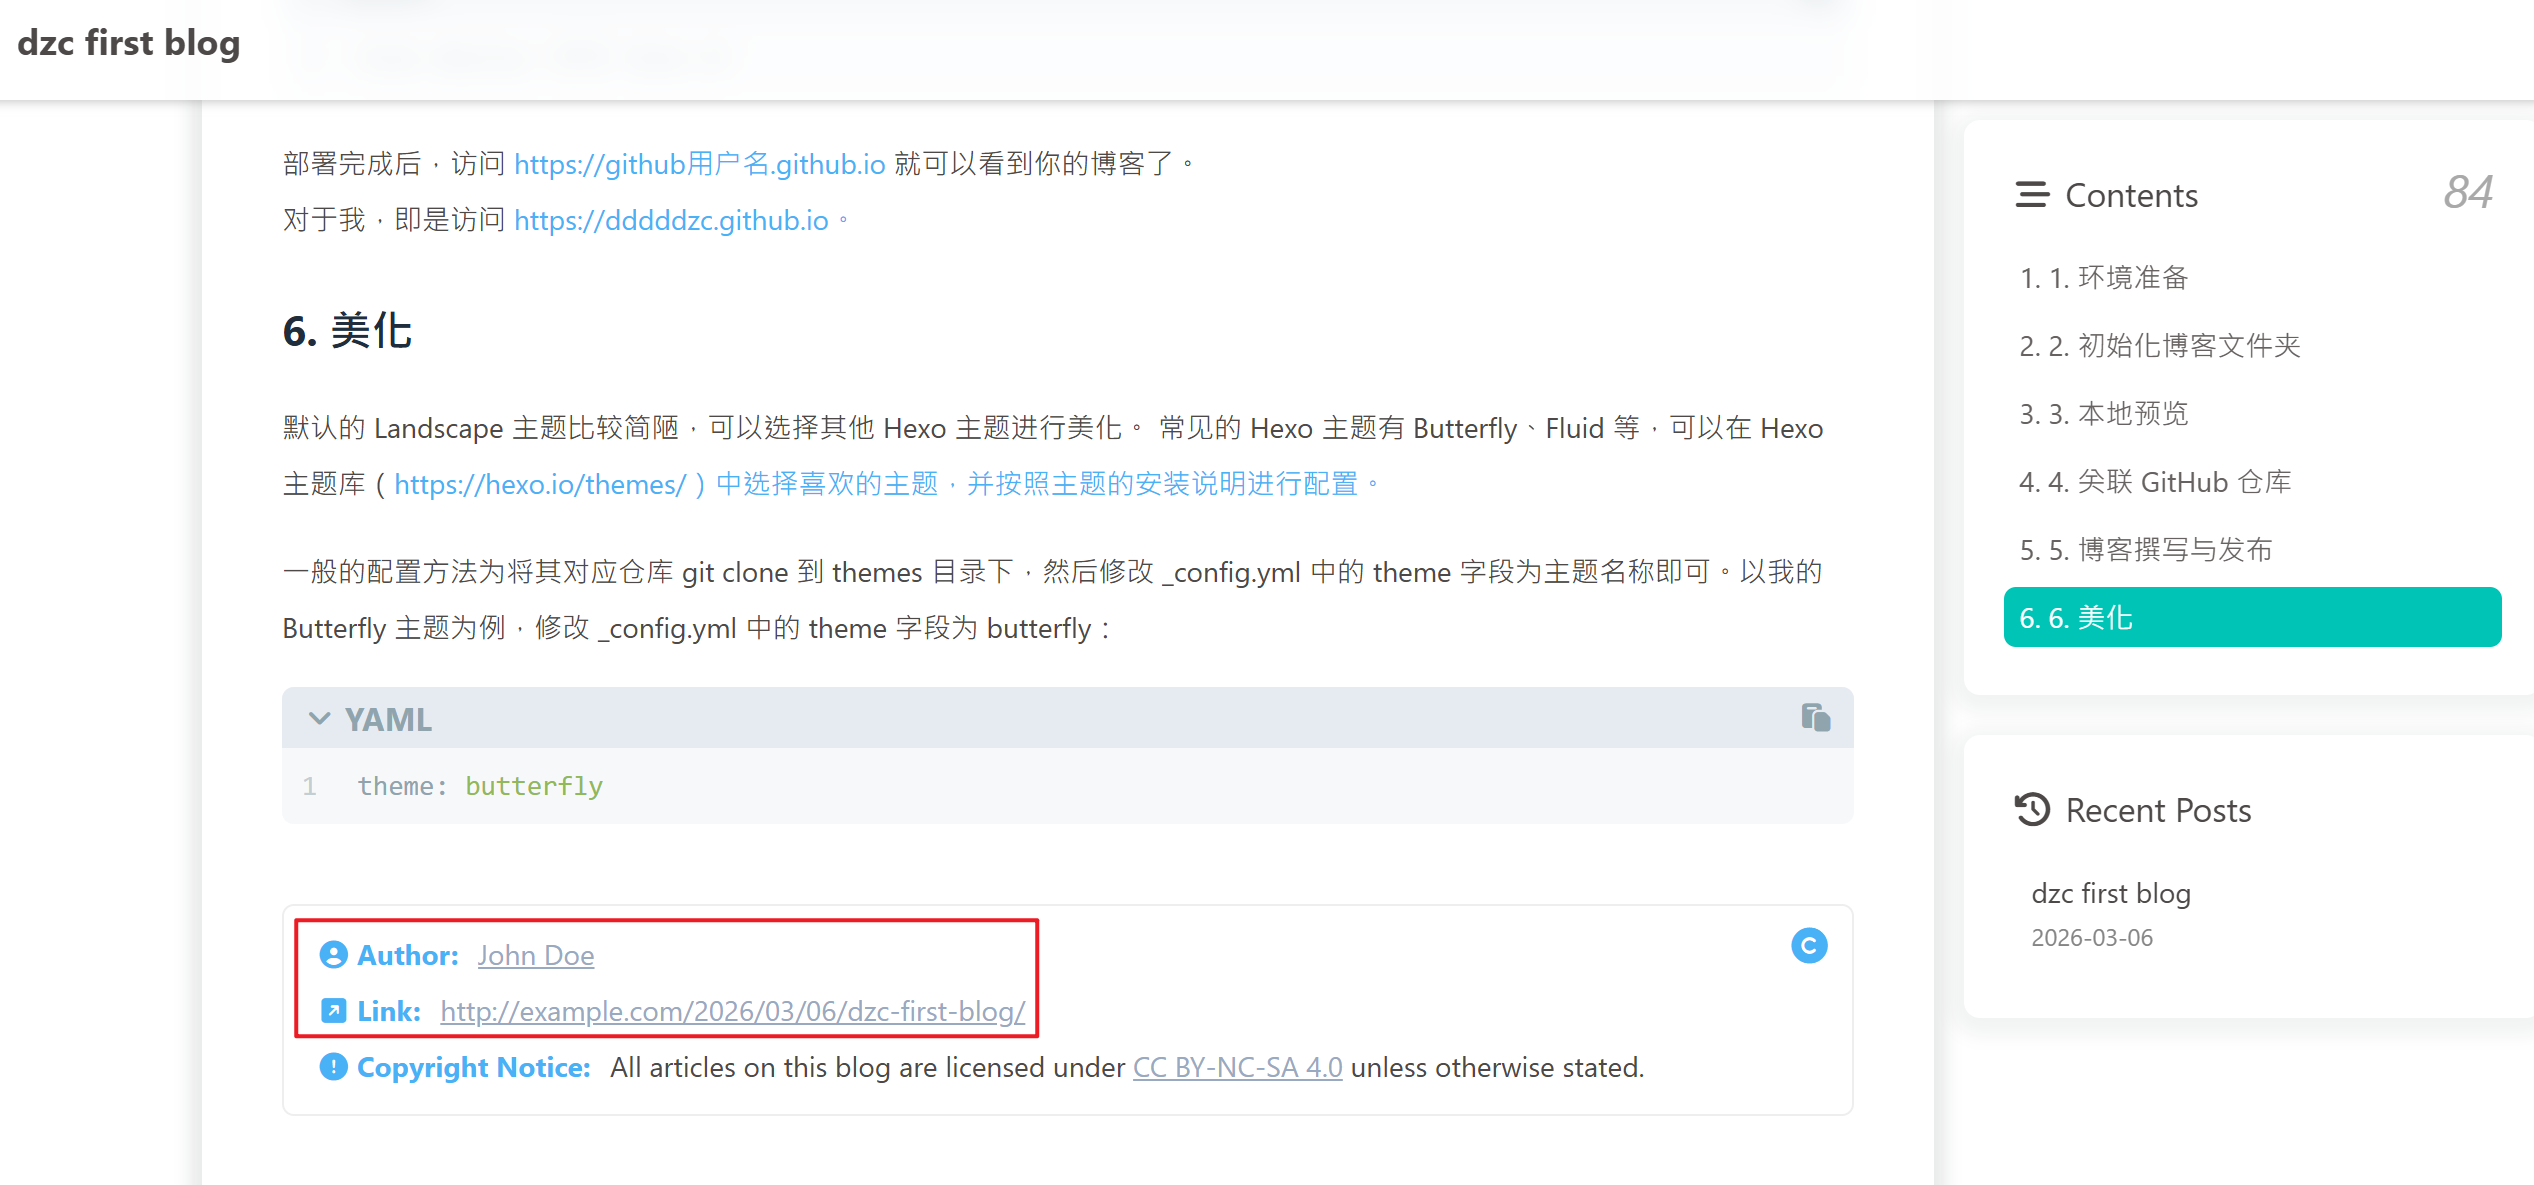
美化
默认的 Landscape 主题比较简陋,可以选择其他 Hexo 主题进行美化。 常见的 Hexo 主题有 Butterfly、Fluid 等,可以在 Hexo 主题库 https://hexo.io/themes/ 中选择喜欢的主题,并按照主题的安装说明进行配置。
一般的配置方法为将其对应仓库 git clone 到 themes 目录下,然后修改 _config.yml 中的 theme 字段为主题名称即可。以我的 Butterfly 主题为例,修改 _config.yml 中的 theme 字段为 butterfly:
1 | theme: butterfly |
其他配置修改
在配置完成后,推送第一篇博客,发现部分内容不是自己所期望的:
原因是 _config.yml 中的 title 和 author 等字段没有修改,导致博客标题和作者信息显示为默认值。
默认值如下:
1 | # Site |
修改 _config.yml 中的部分字段为自己想要的值即可:
1 | # Site |
此外,首页的 头像 和 Follow Me 按钮也是默认的,无法正常工作:
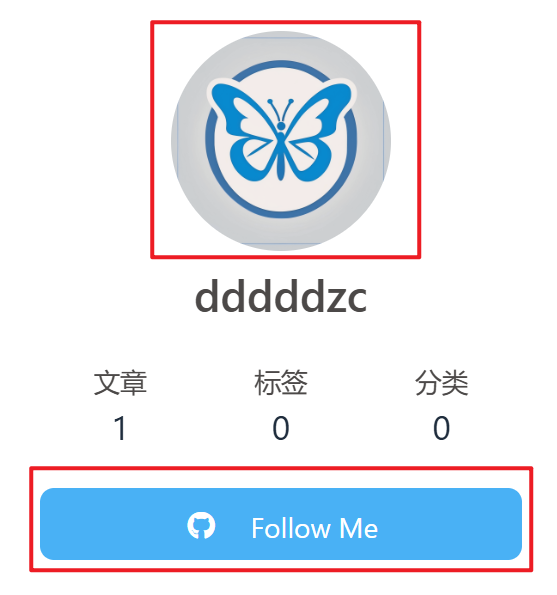
需要修改主题的配置文件(以 Butterfly 主题为例,修改 themes/butterfly/_config.yml)中的相关字段即可。
默认头像链接:
1 | avatar: |
修改 img 字段为自己的头像链接即可。
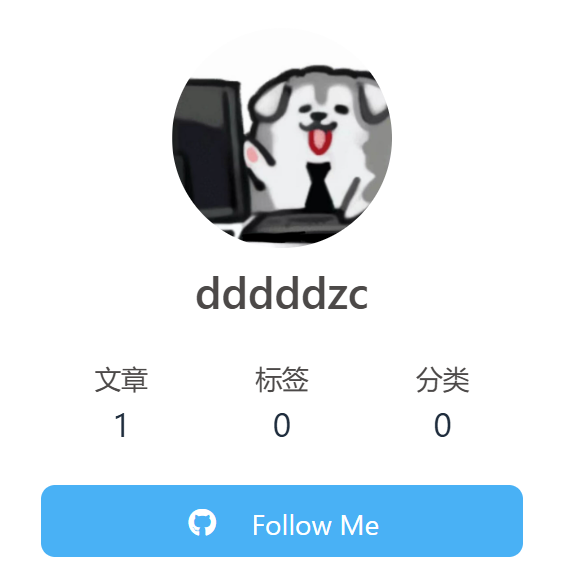
默认 Follow Me 链接:
1 | aside: |
修改 link 字段为自己的 GitHub 链接即可。
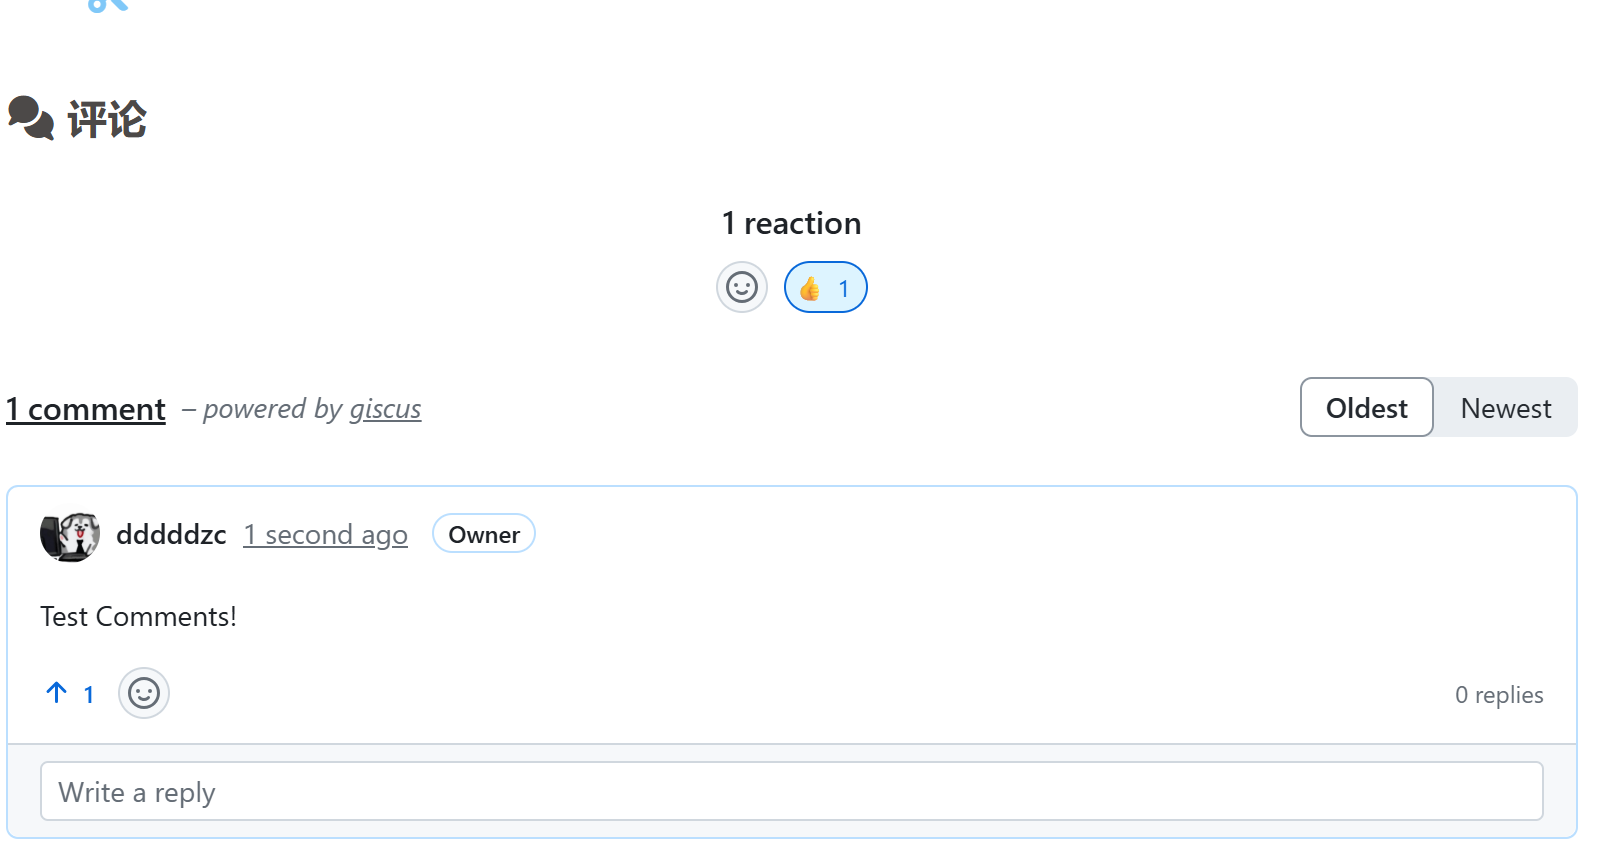
接入评论功能
评论功能本质上是第三方插件。主题(如 Butterfly)的代码里已经写好了对接这些插件的逻辑,只需要去第三方平台申请一个“钥匙”(Key),然后填入主题配置即可。
对于 Butterfly 主题,推荐 Giscus 方案(适合 GitHub 玩家)。
原理: 利用 GitHub 仓库的 Discussions 功能存储评论。
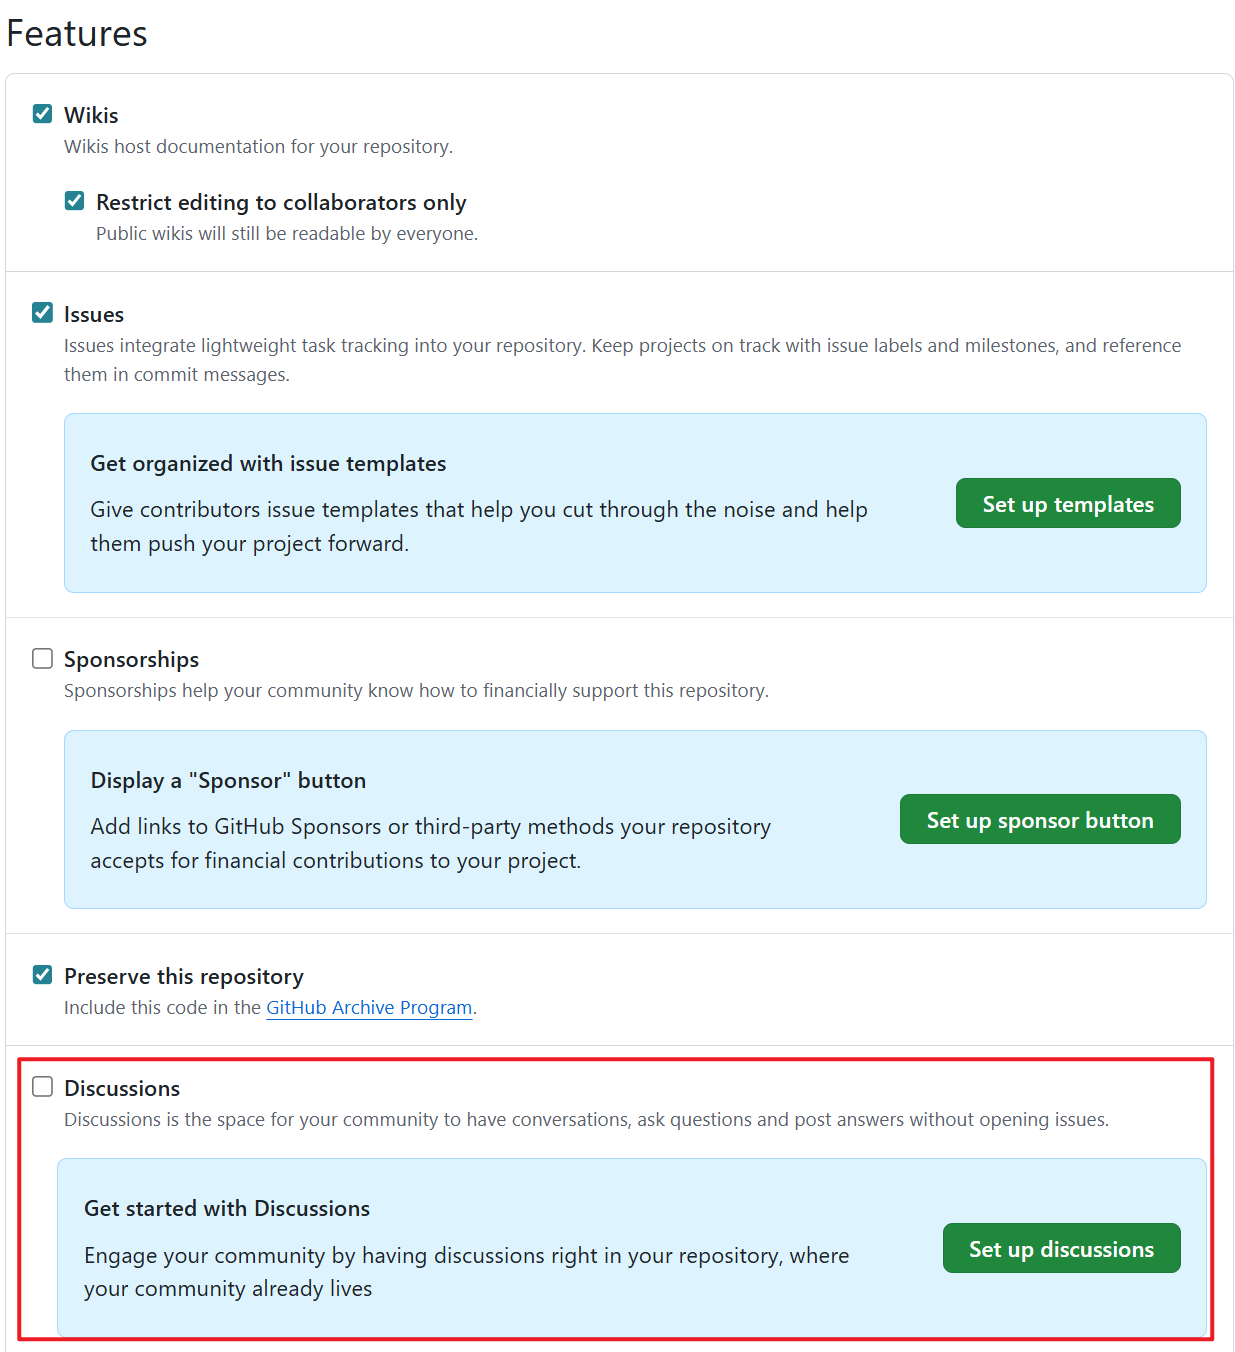
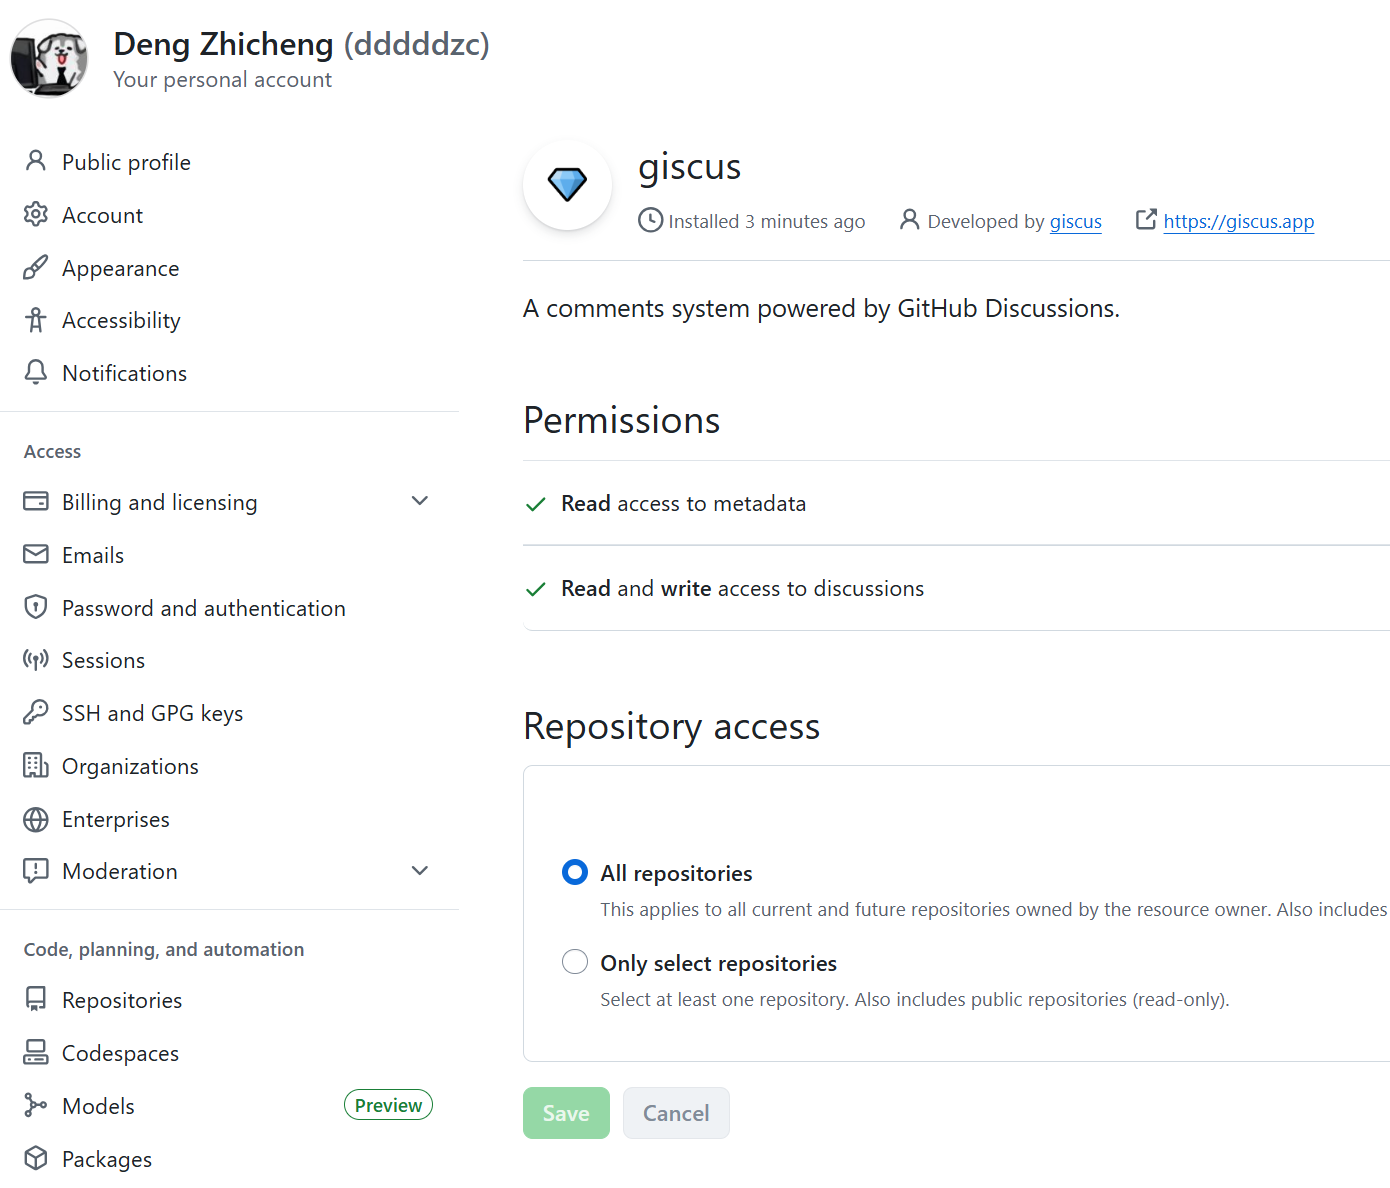
开启 GitHub Discussions
进入你的博客仓库 https://github.com/dddddzc/dddddzc.github.io ,点击顶部的Settings,向下滚动到 Features 区域,勾选 Discussions 选项:
配置 Giscus
giscus是一个 Github App,进入 giscus 安装界面 https://github.com/apps/giscus ,点击绿色的 Install 按钮进行安装。
访问 giscus 官网 https://giscus.app/zh-CN ,如下配置:
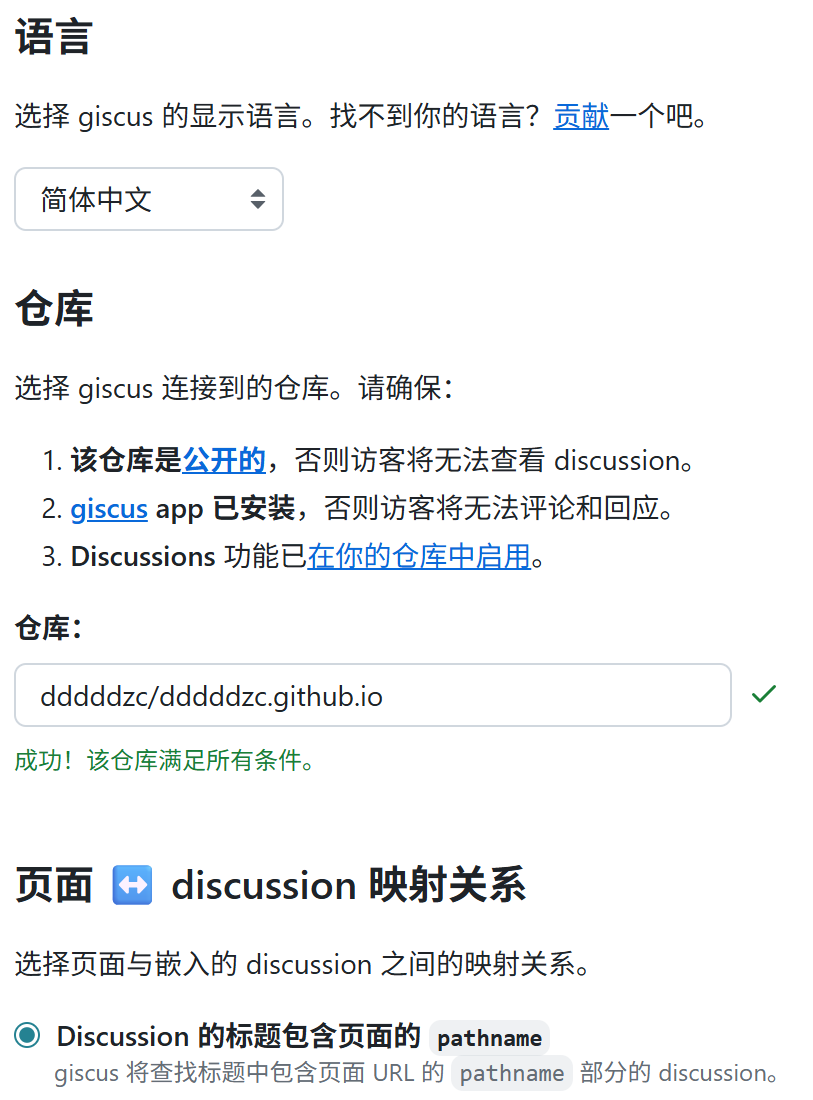
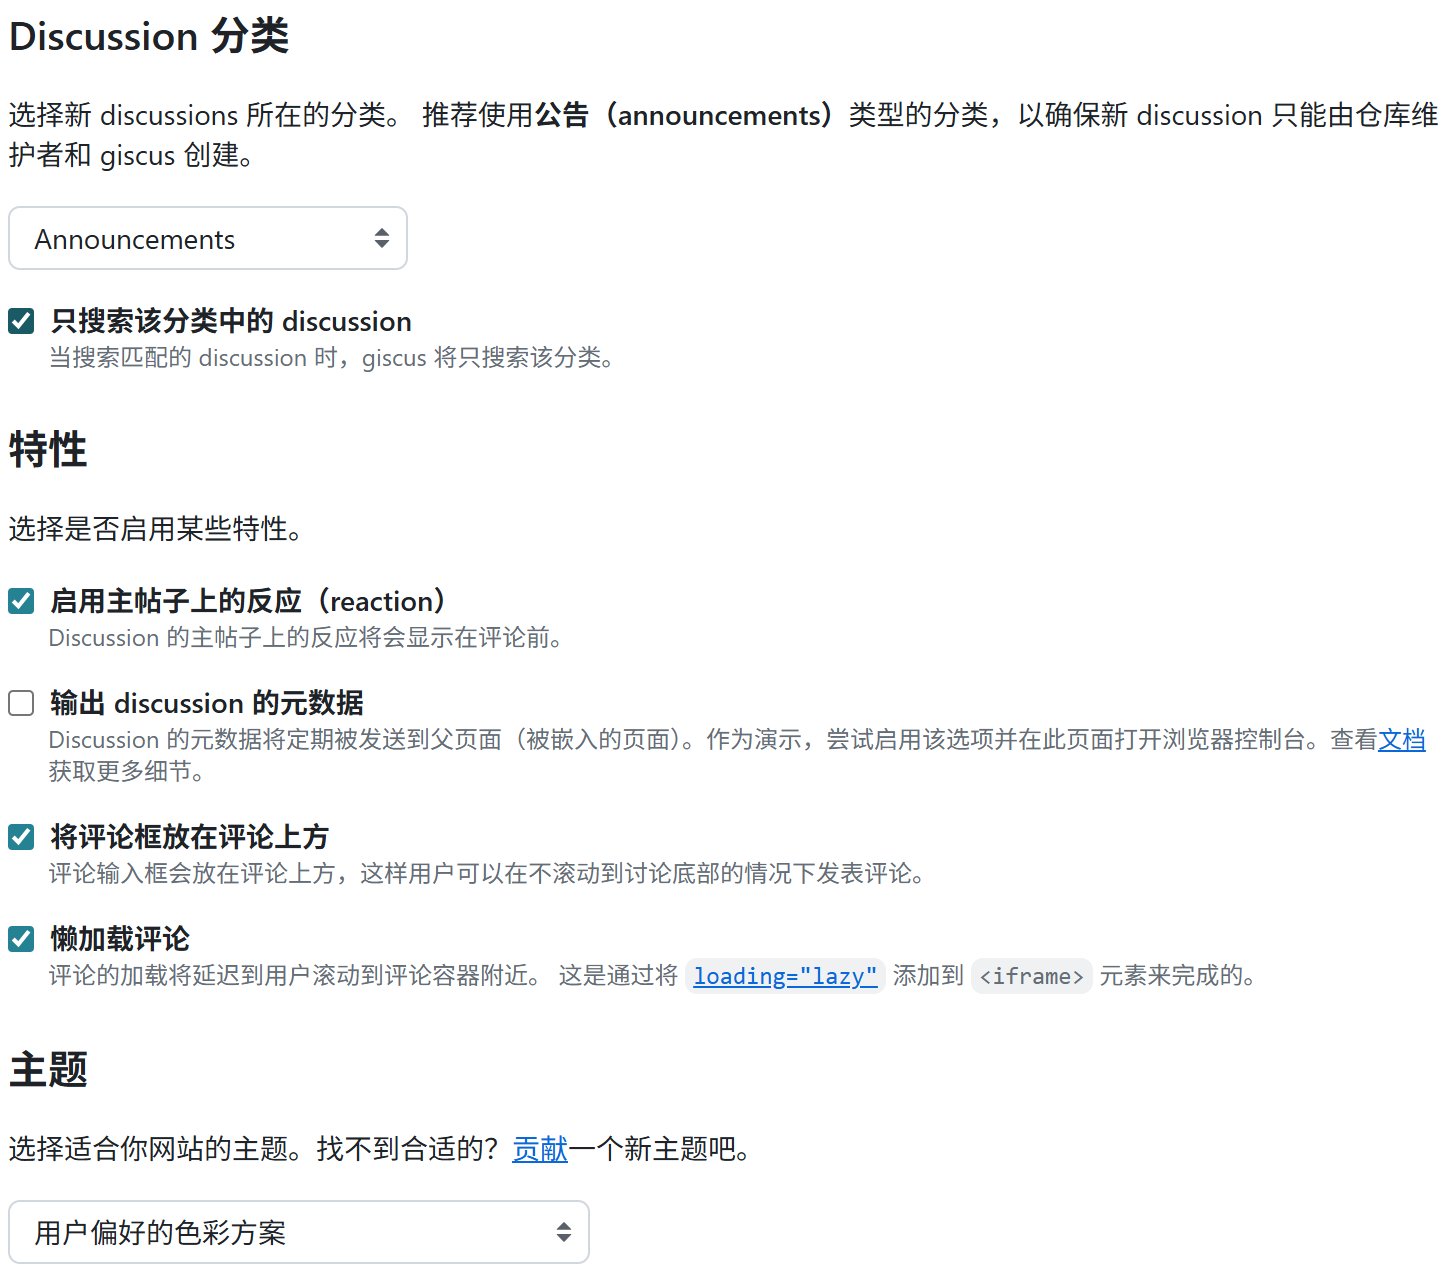
滚动到页面下方的一段 JavaScript 代码。记住里面的参数:data-repo-id 和 data-category-id
修改主题配置
打开主题的配置文件(以 Butterfly 主题为例,themes/butterfly/_config.yml),搜索 comments 部分并修改如下:
1 | comments: |
然后填充 Giscus 的具体参数,主要是填写 repo_id 和 category_id 即可:
1 | giscus: |
评论区加载成功!